Hosting a static site on aws s3
For over a decade I've bounced between GoDaddy and NameCheap for all my personal domain and web hosting needs. While those services are easy, they don't provide the scaling or performance to match my current 2019 use cases. As a result I've shifted to Amazon Web Services.
On AWS a basic static website can be created using two services: Route 53 and S3. And If we want a secure website we can enable https by including CloudFront into our configuration.
Pros and Cons of S3 Website Hosting
Low Cost. Cloud pricing can get extremely complex, but it ultimately is very low cost. On S3, each Gigabyte of storage costs approximately $0.023 cents per month.
Speed. Without getting into the nitty gritty of Regions and CDNs, for all intents and purposes serving files from S3 will be limited only by the user's network speed.
The major drawback of using S3 is it can only be used to host static websites and client side scripting. This means it can be used to host a React.js site, or Vue.js. But it cannot be used for Wordpress or any PHP or node.js code.
Basic setup HTTP setup
Prerequisites
If you're looking to make your website available at a custom domain name you'll have to purchase it first. That can be done through AWS or with any other domain registrar. However if it is purchased outside of AWS you'd need to point the NS records to a Route 53 hosted zone so your domain can be managed on AWS and used in the configuration below.
S3 Setup
-
Step 1: Creating the bucket
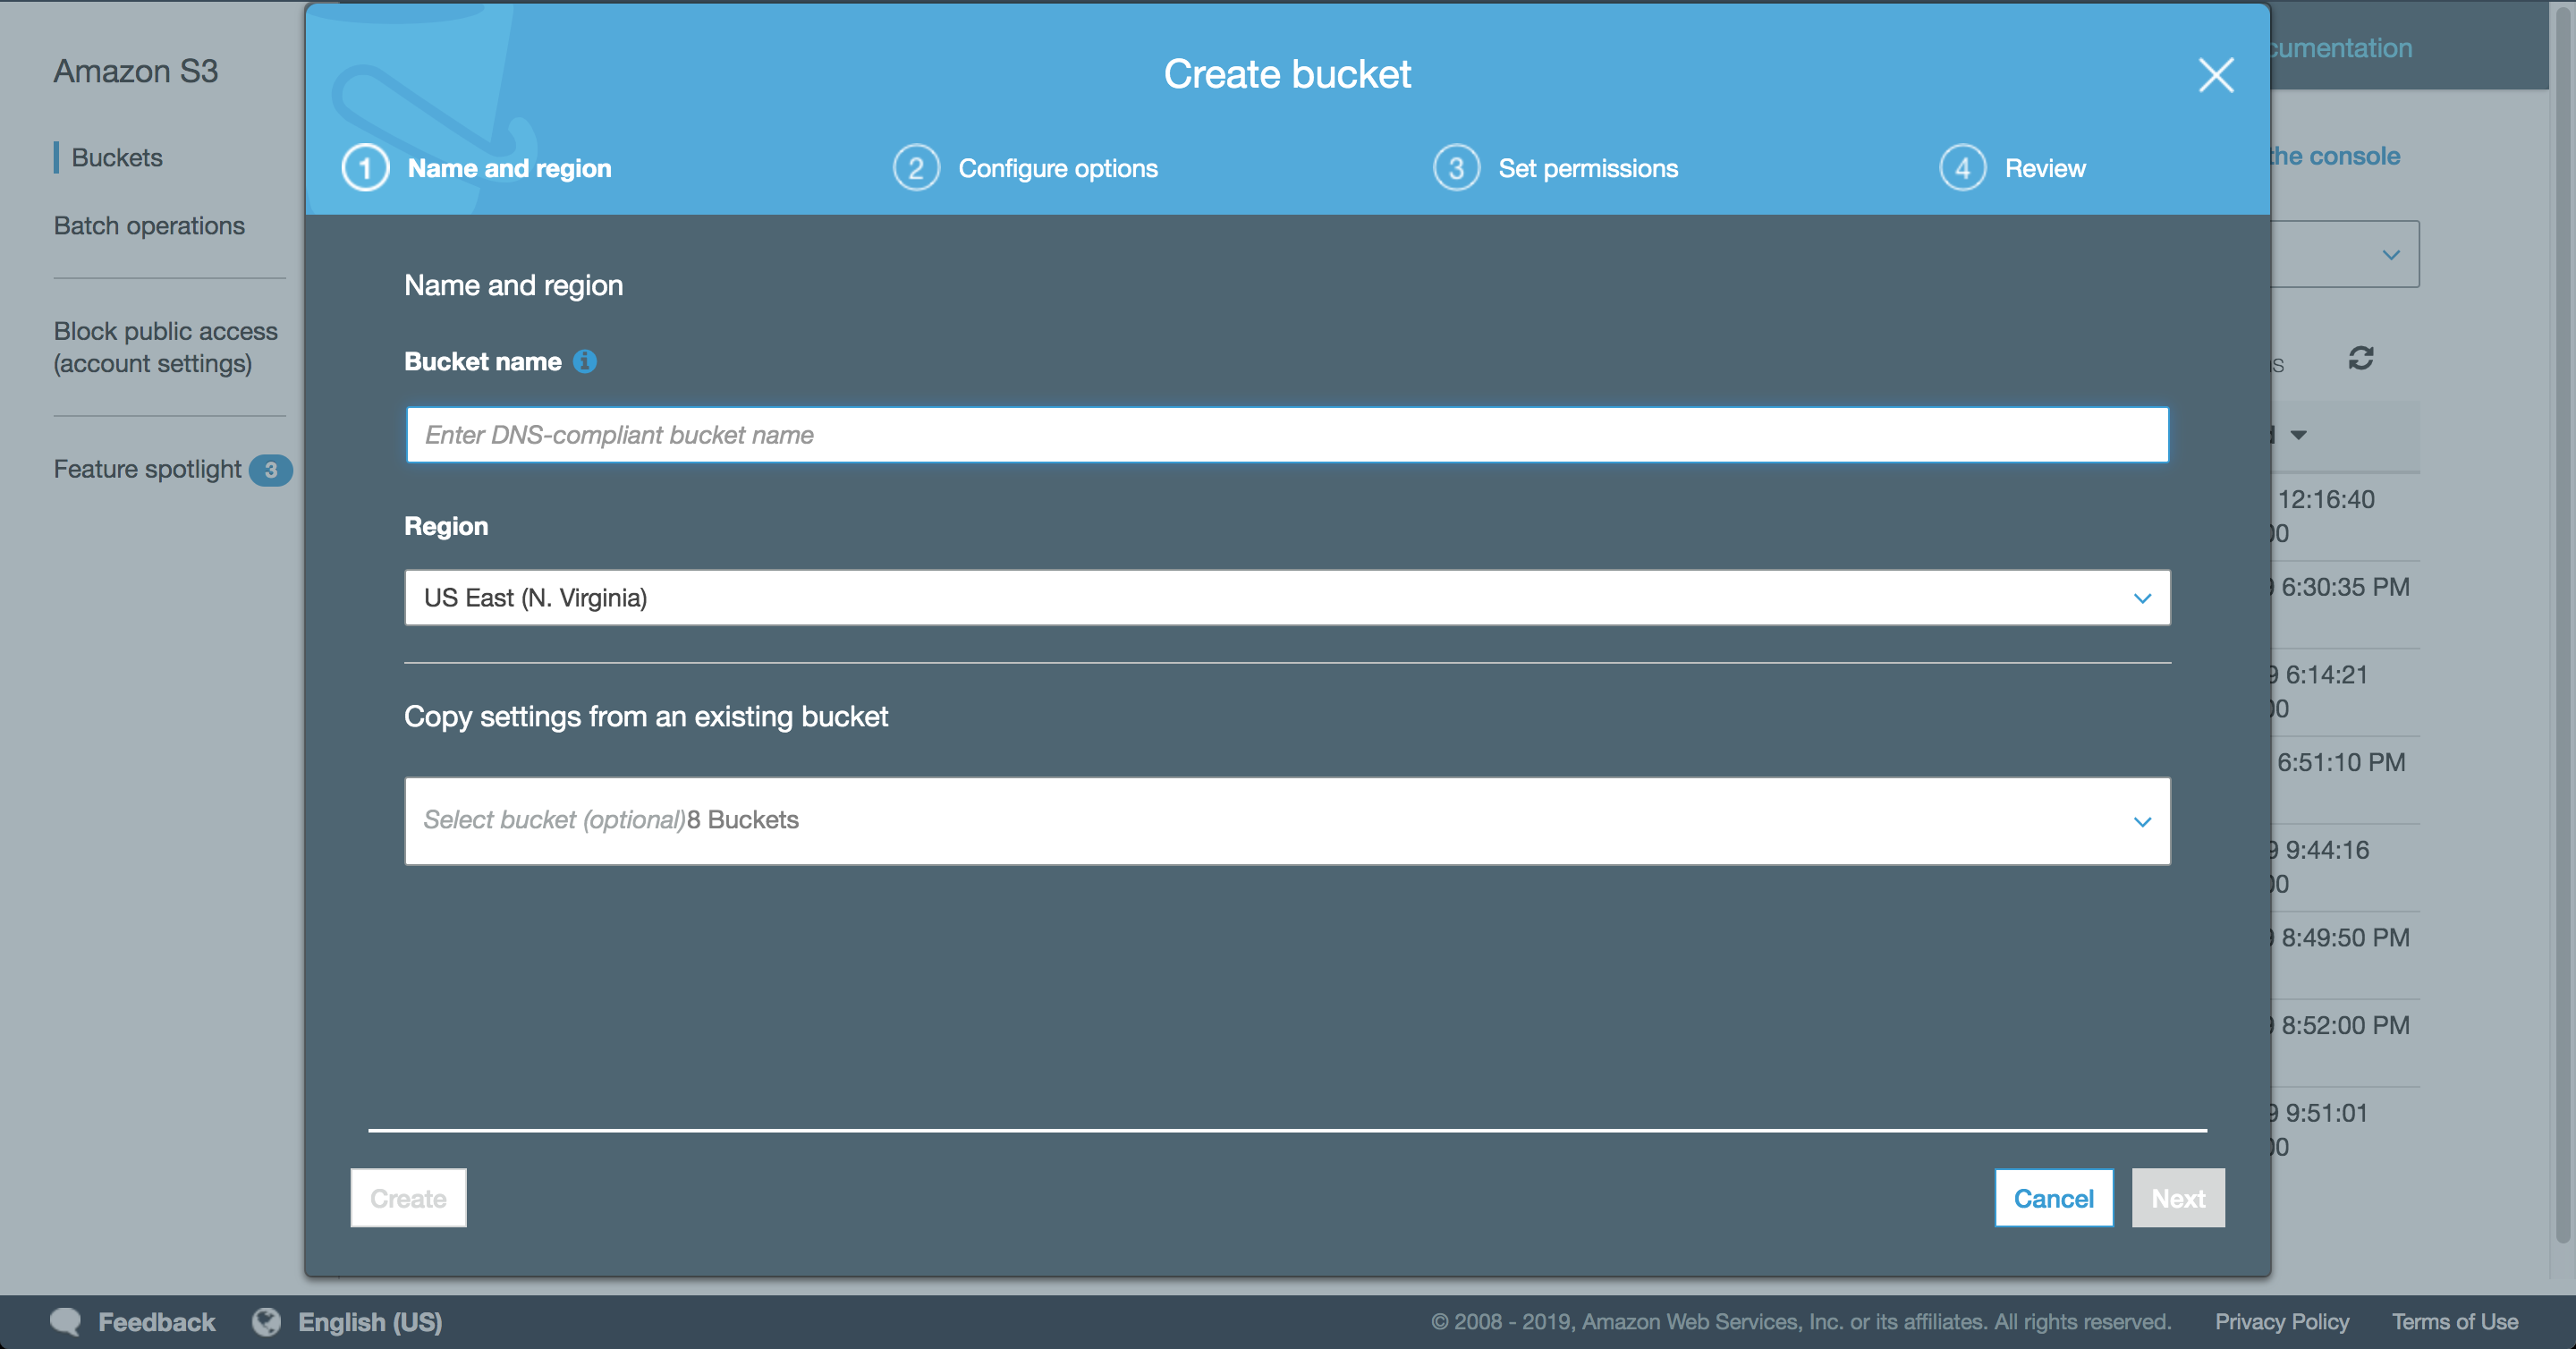
Open the S3 Console and press + Create bucket. Assuming you intend for your bucket to be accessible through your custom domain, the domain name must exactly match the website it will be hosting. For example, if the S3 bucket will be hosting https://blog.mysite.com, the bucket name must be blog.mysite.com. If the site will be hosting a root level domain, the bucket name must be mysite.com. Press Create when ready. -
Step 2: Files & Permissions
With the bucket created, click the bucket name to enter inside. Upload your site files to the S3 bucket using the Upload button on the Overview tab. Once your files are in place, we'll need to make sure the bucket has public read access. Go to the Permissions tab and select Bucket Policy. Paste in the following bucket policy to allow read access to bucket content. Be sure to replace mysite.com with your URL.{ "Version": "2012-10-17", "Statement": [ { "Sid": "PublicReadGetObject", "Effect": "Allow", "Principal": "*", "Action": "s3:GetObject", "Resource": "arn:aws:s3:::mysite.com/*" } ] } -
Step 3: Enable Static Website Hosting
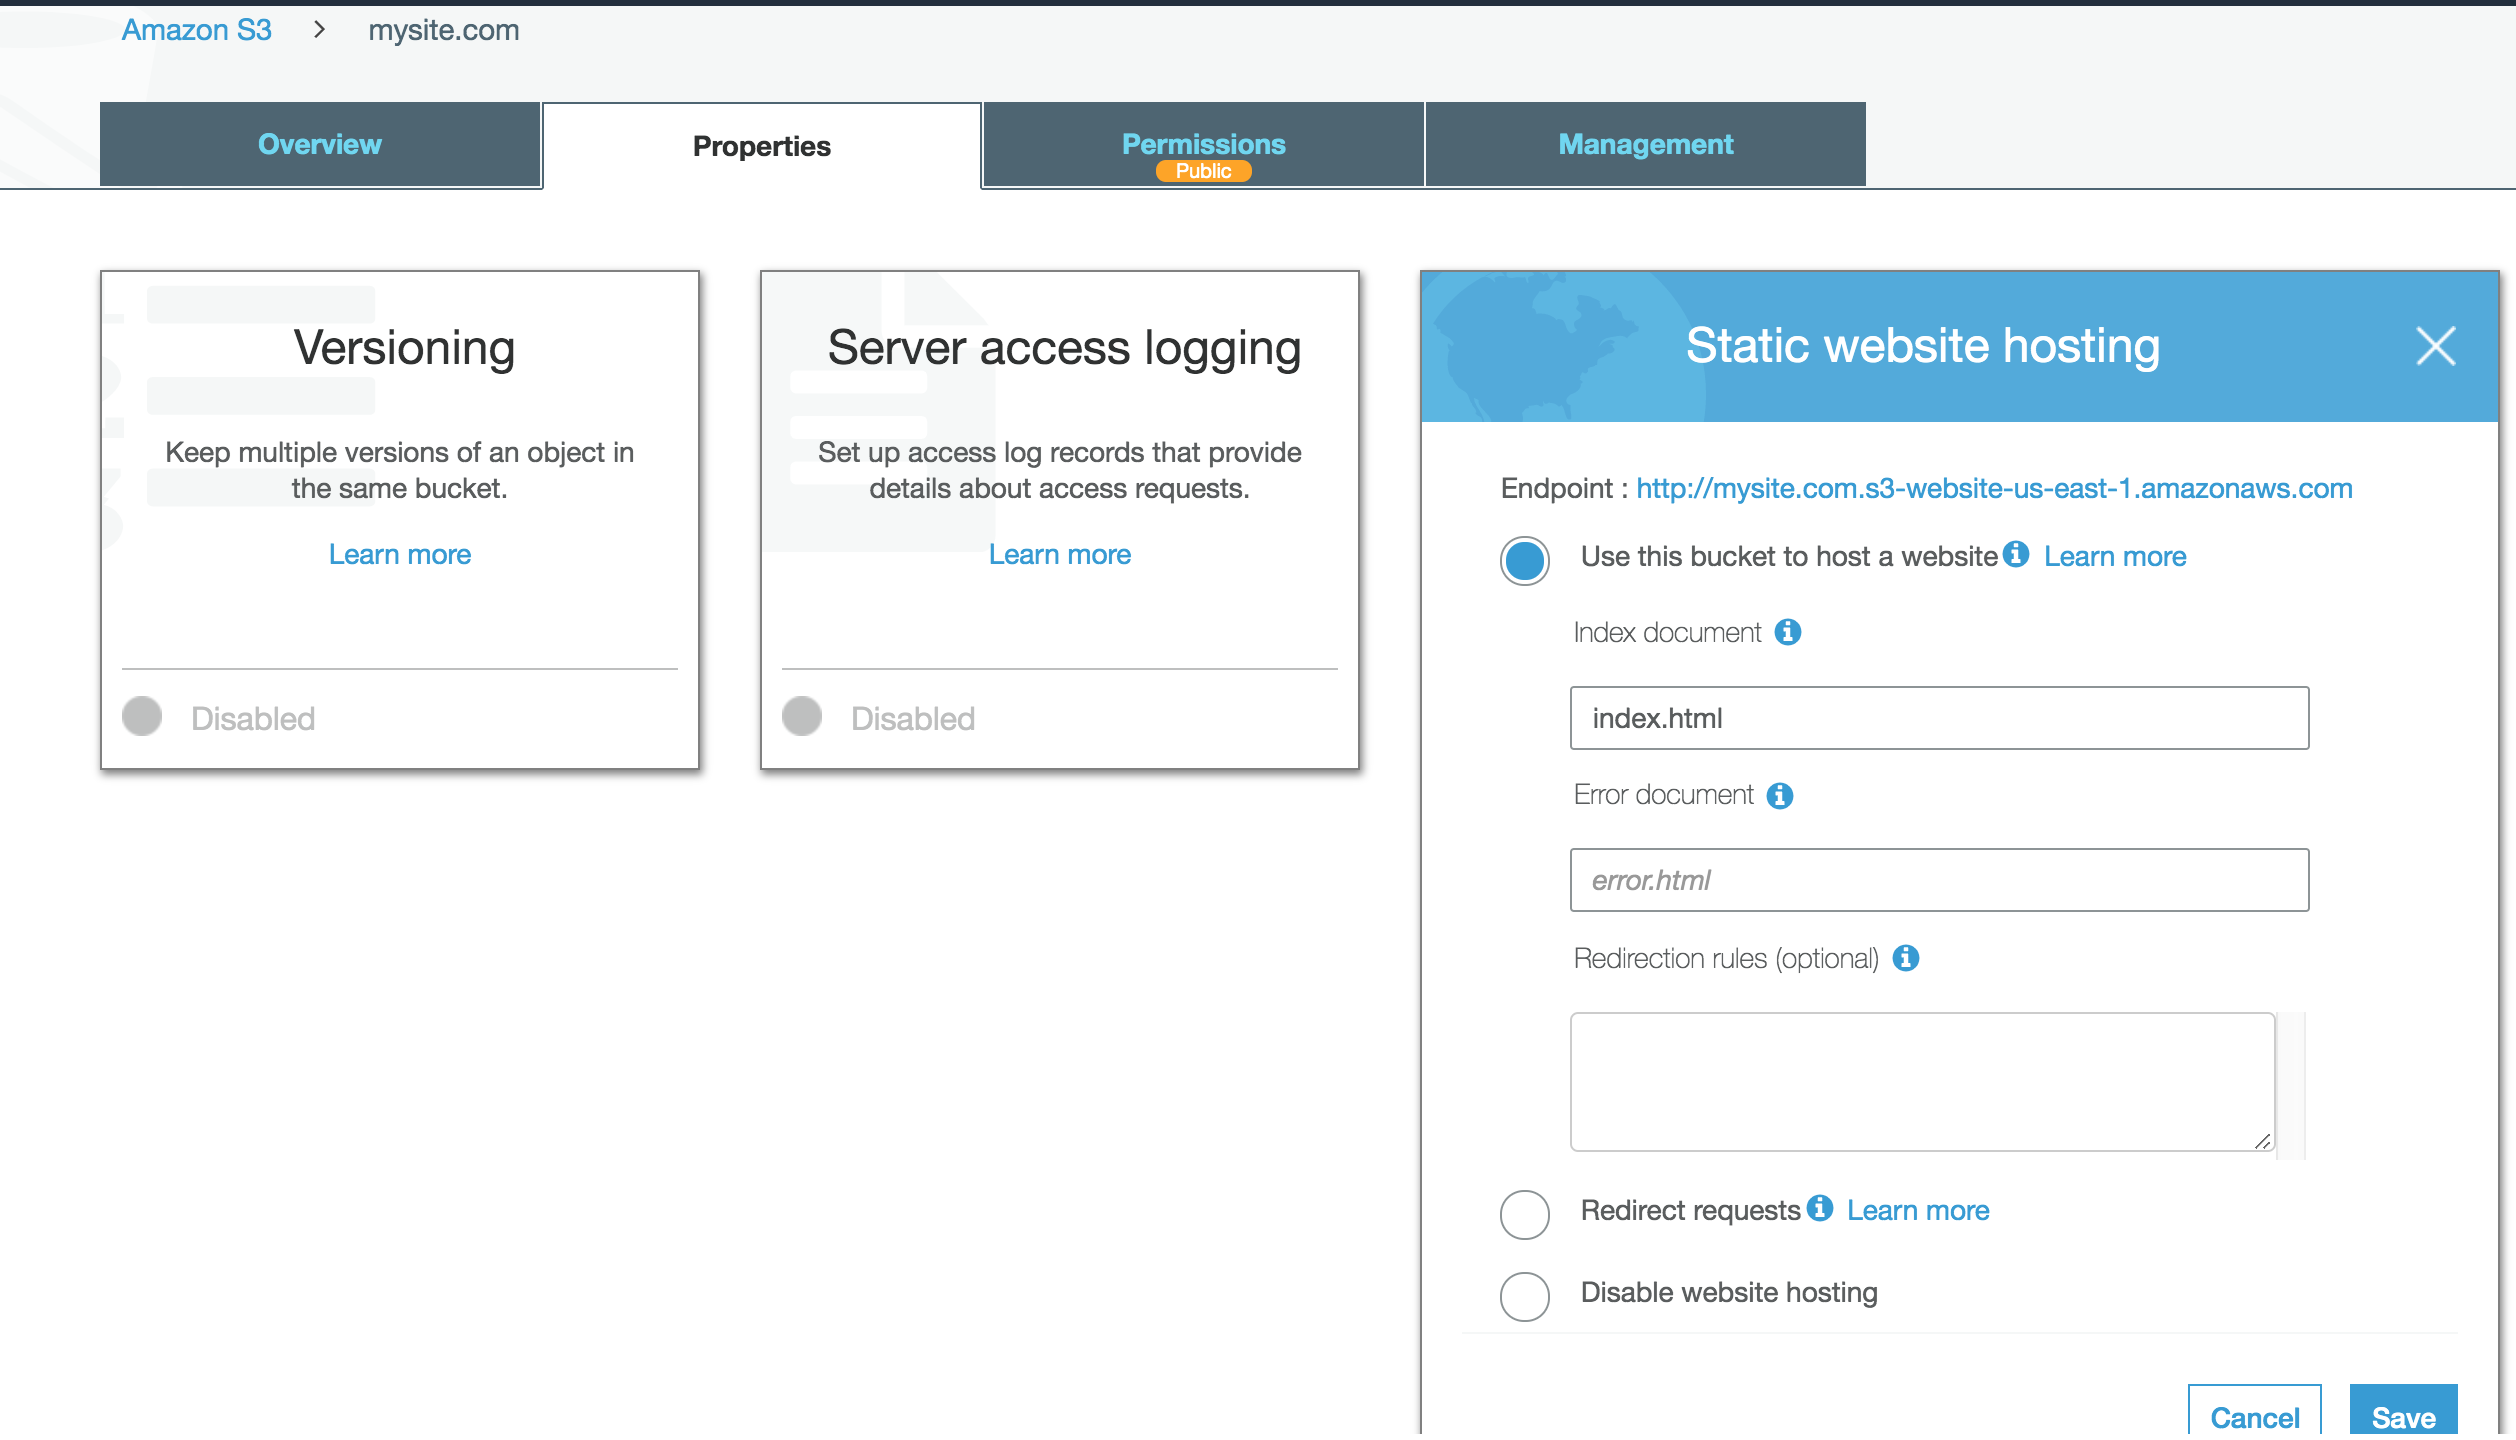
Go to Properties and enable Static website hosting . When this is enabled it produces an Endpoint URL. This can be used to access your site with https. If you don't care about using your own custom URL, you could stop right here.Copy the Endpoint URL. We'll need it for the next section. It'll look like this:
http://mysite.com.s3-website-us-east-1.amazonaws.com
Route 53 Setup
Now that we have an S3 bucket accessible by an Endpoint URL we need to make it accessible through our domain name, too.
-
Step 1: Create a Hosted Zone
Open the Route 53 Console.
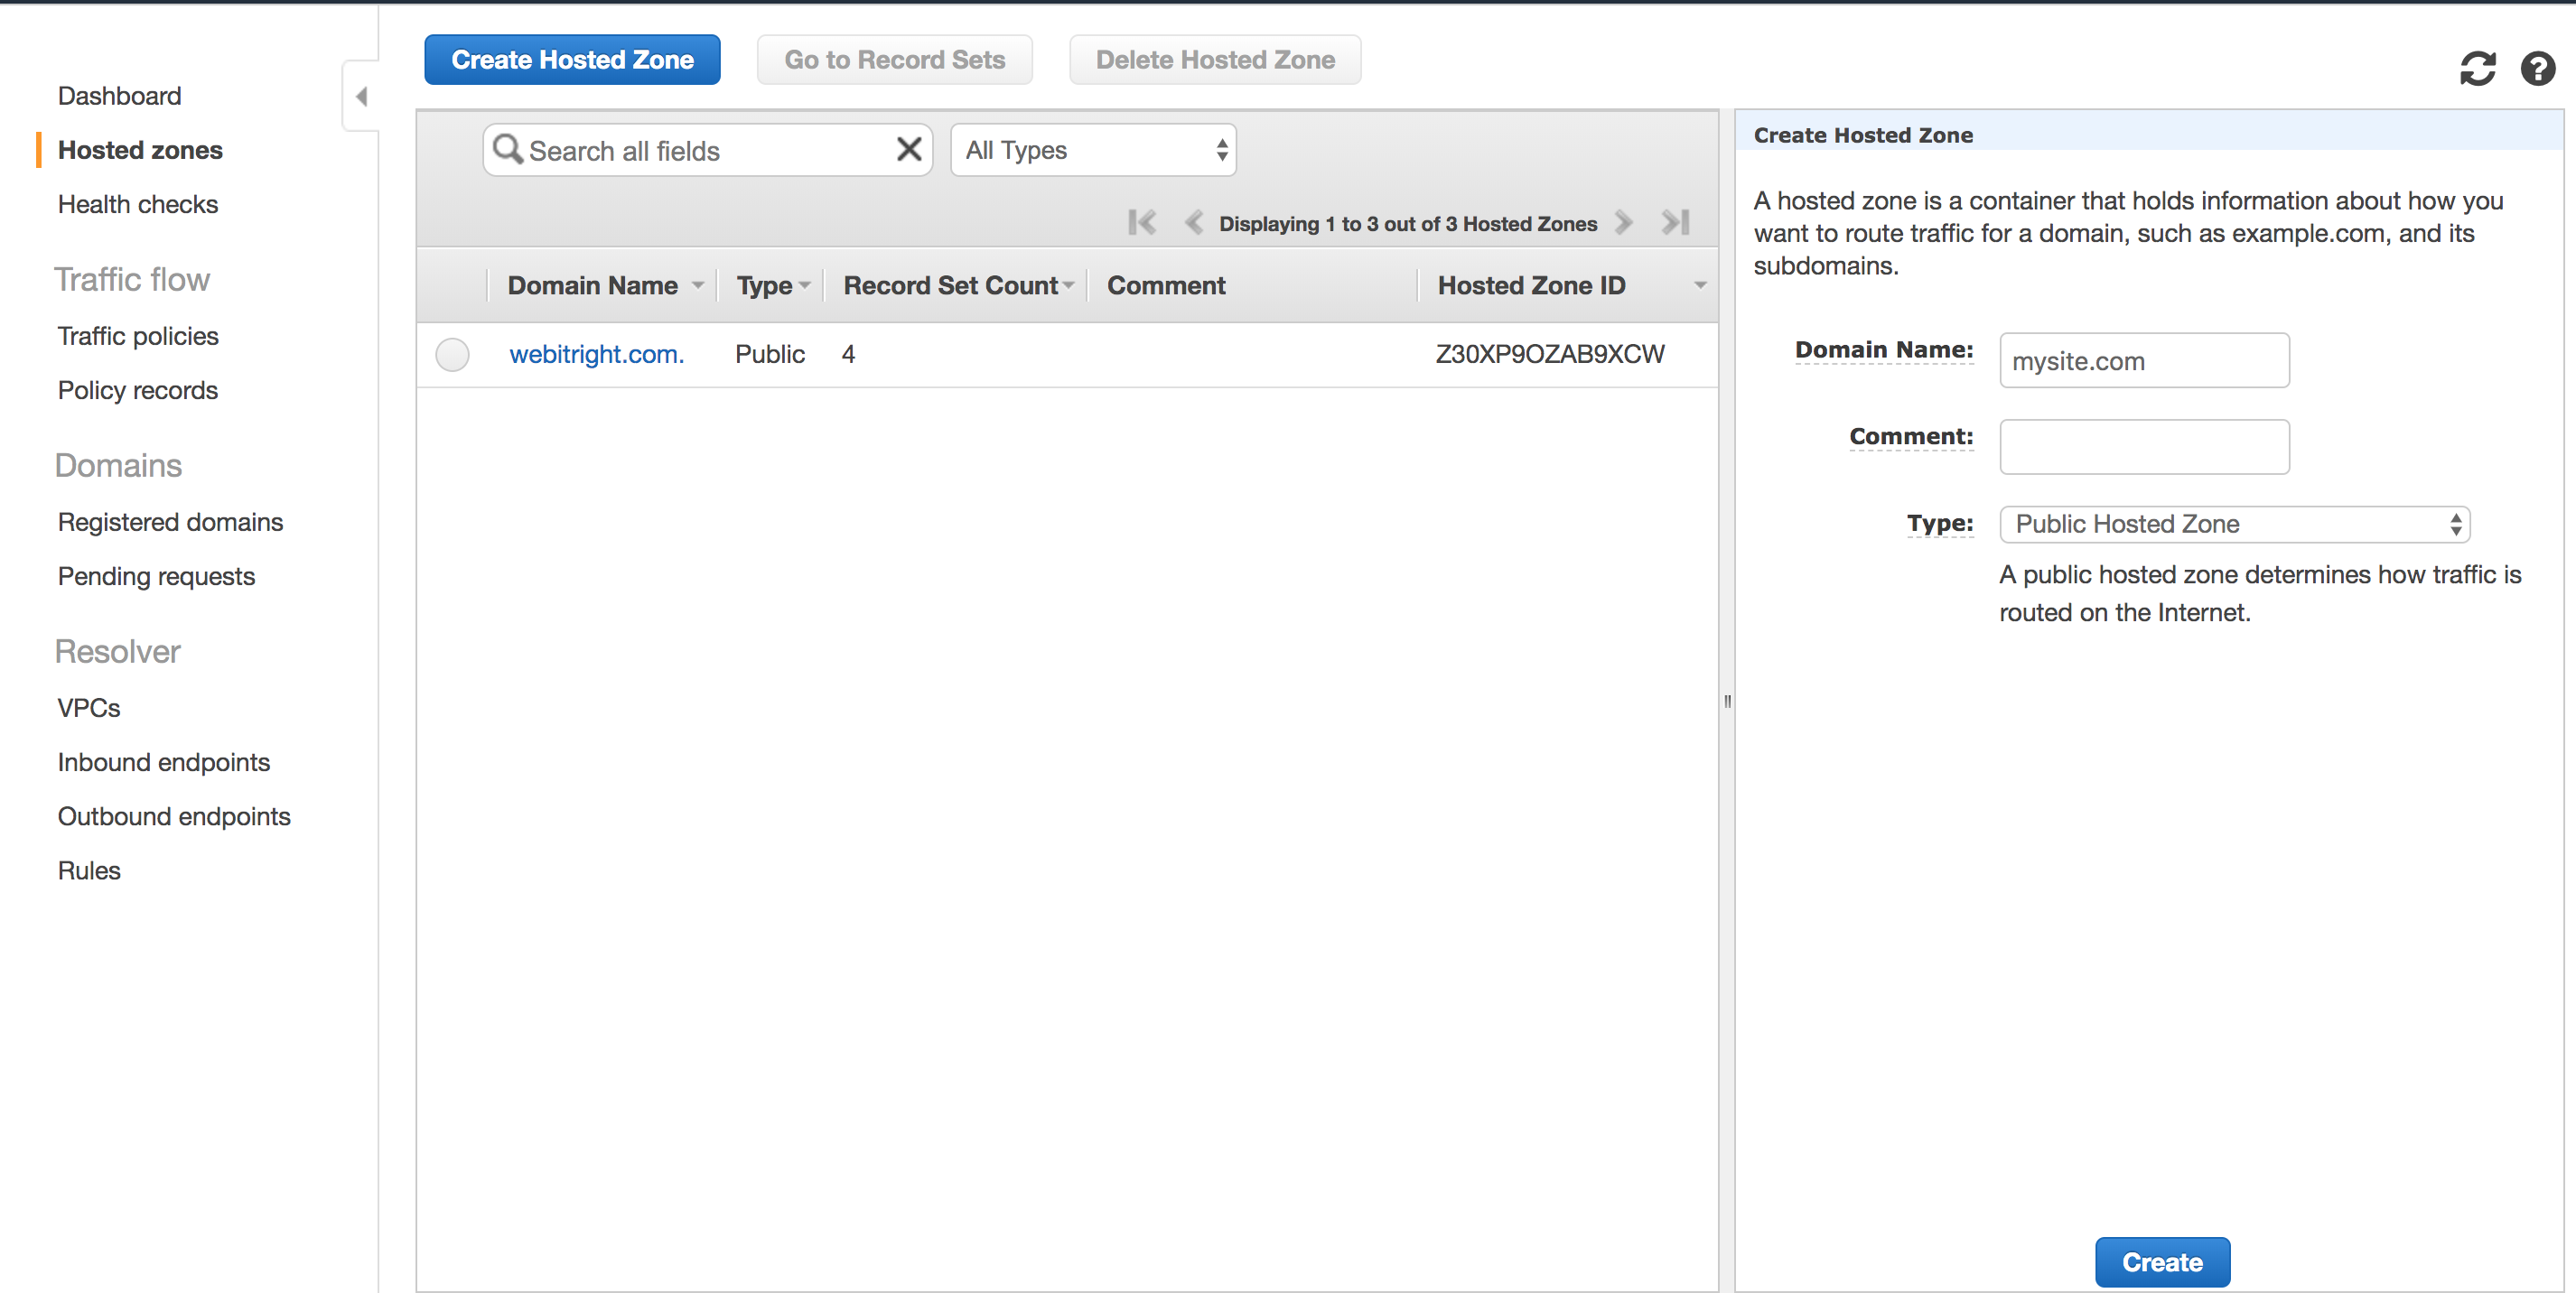
Create a hosted zone with the name of the desired domain.
Click into the newly created zone to insert a new record. -
Step 2: Create an A Record
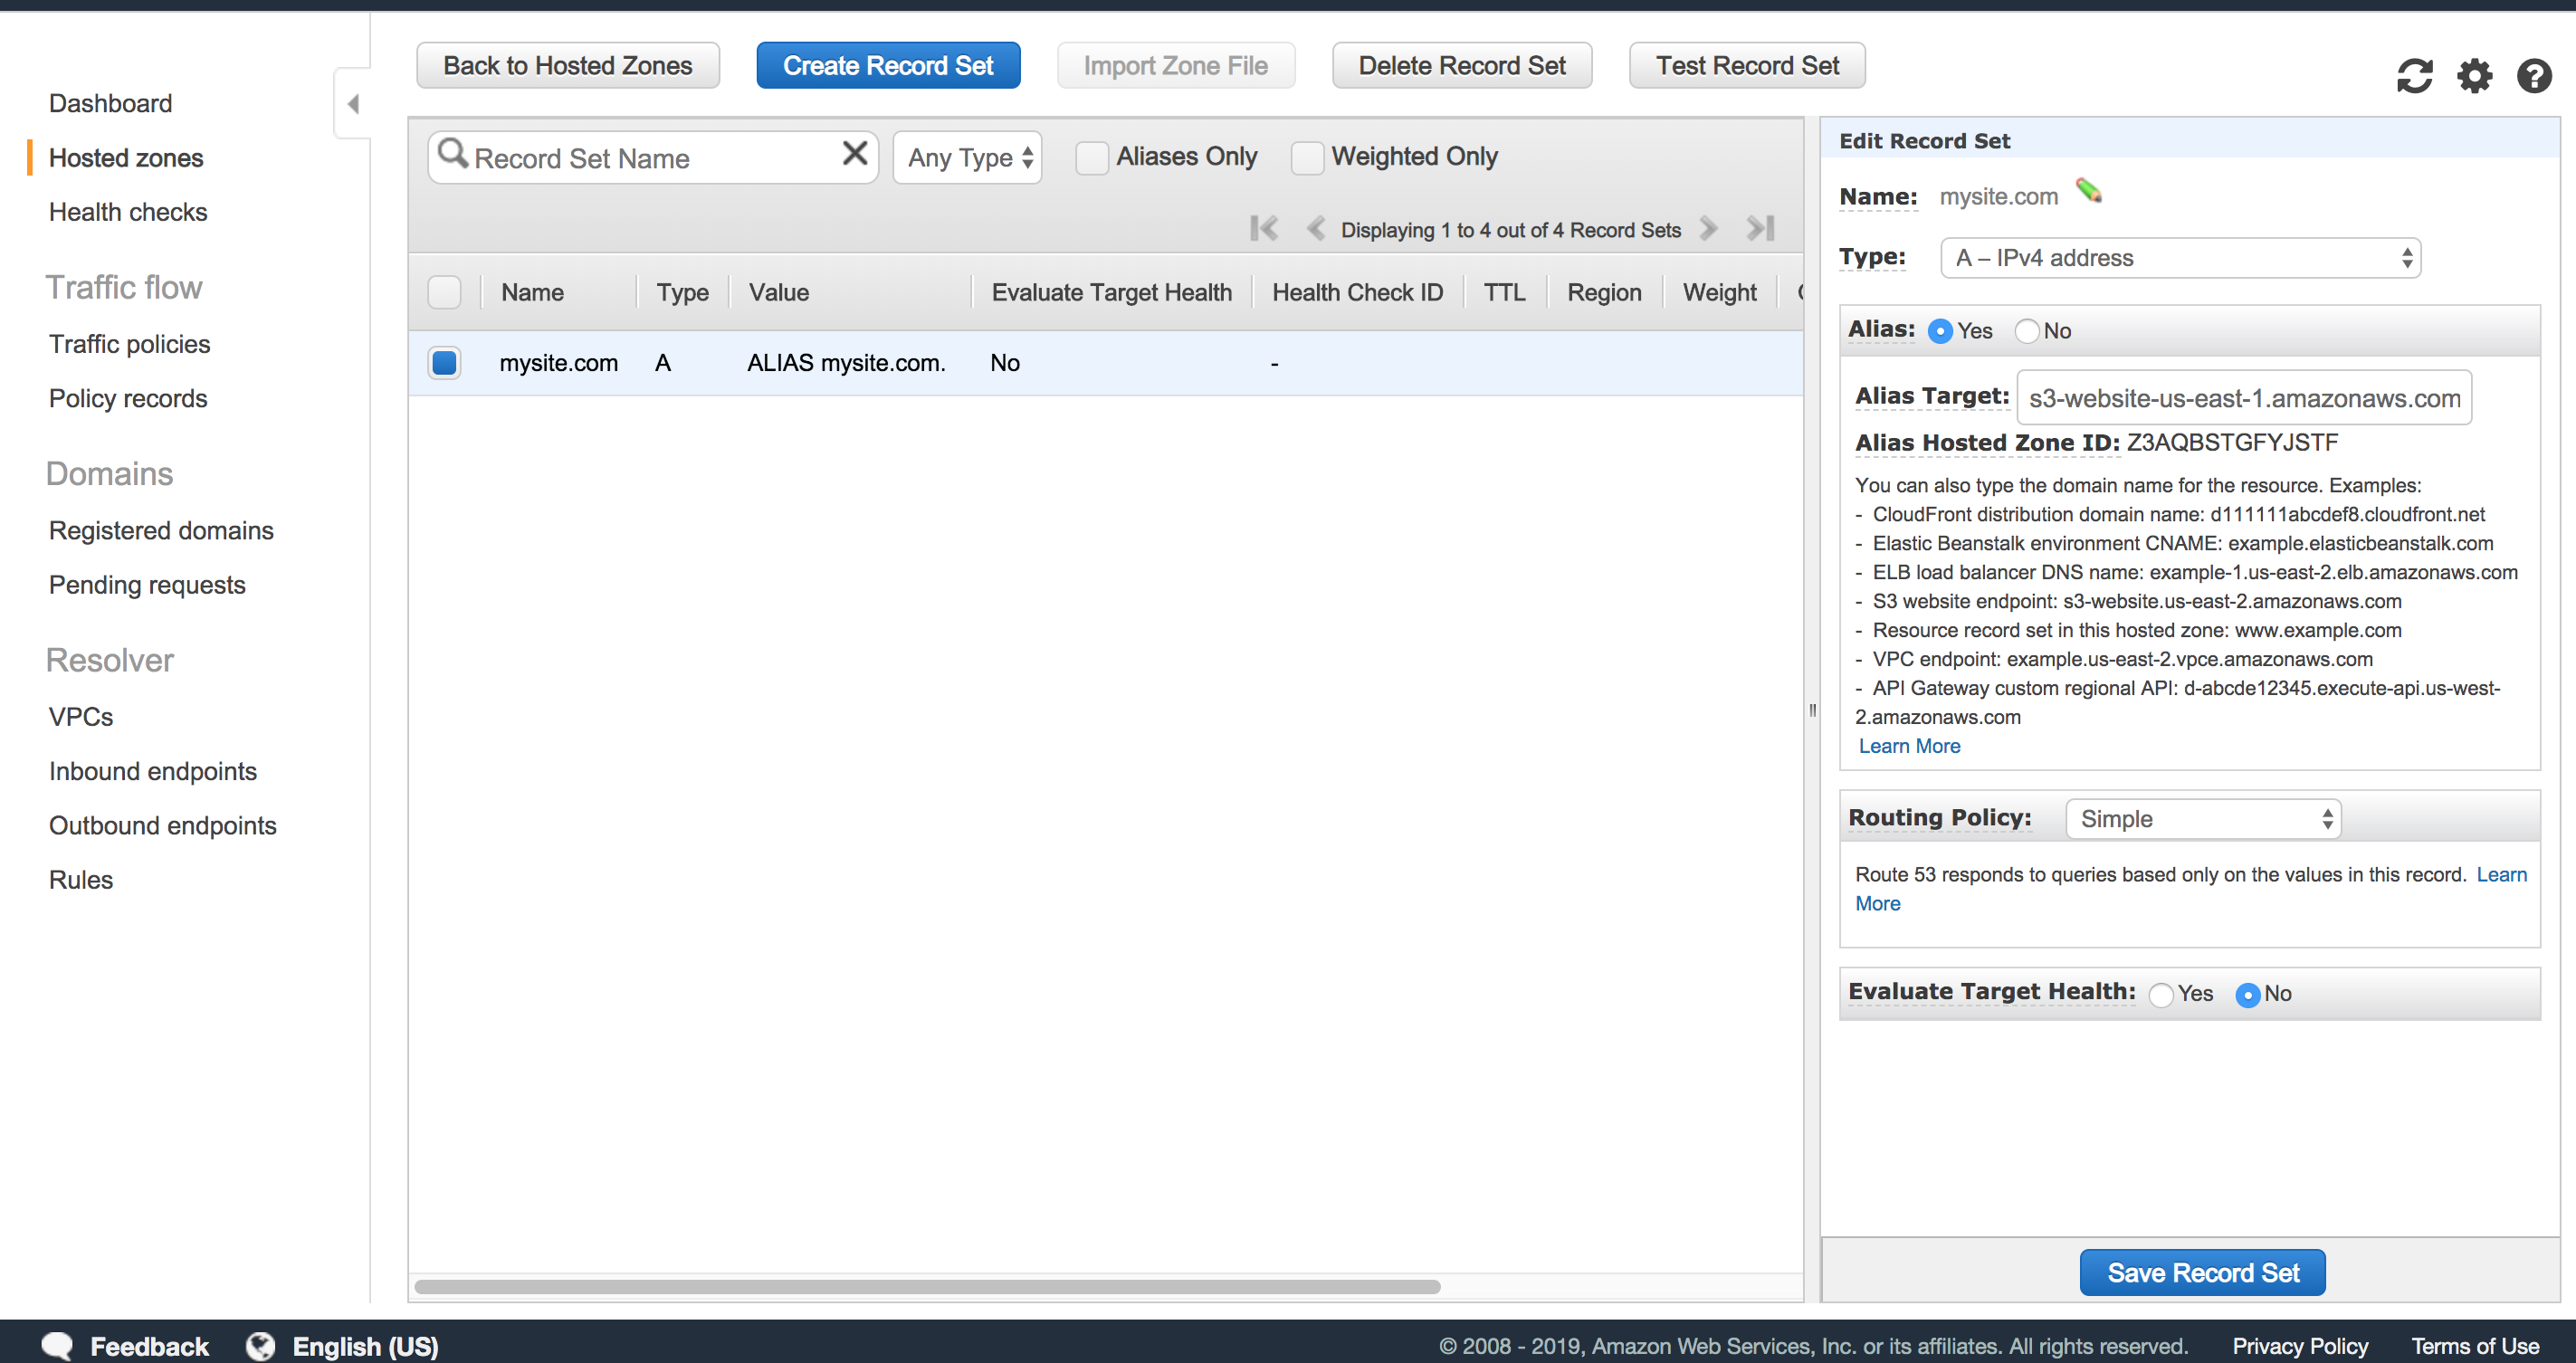
Press Create Record Set to generate a new recordChoose A Record and set the name to match your domain name.
Configure it as an Alias and set Alias Target to the S3 Endpoint. The name should appear in the drop down menu. If it doesn't, return to your S3 console and verify that the bucket name exactly matches the domain name. Save your record when done.
At this point we can now access our S3 bucket through our desired URL in a browser. However, this URL is only HTTP. If that's good enough, you can stop here. Otherwise we'll configure HTTPS in the next section.
Certificate Manager Setup
Before we enter into CloudFront we want to create a new SSL certificate.
-
Step 1: Create A Certificate
Open the Certificate Manager ConsolePress Request a certificate. If prompted, set the type as public certificate
Under
Add domain namesenter your domain name. E.g.:mysite.comWhen ready, press Next.
-
Step 2: Cert Verification
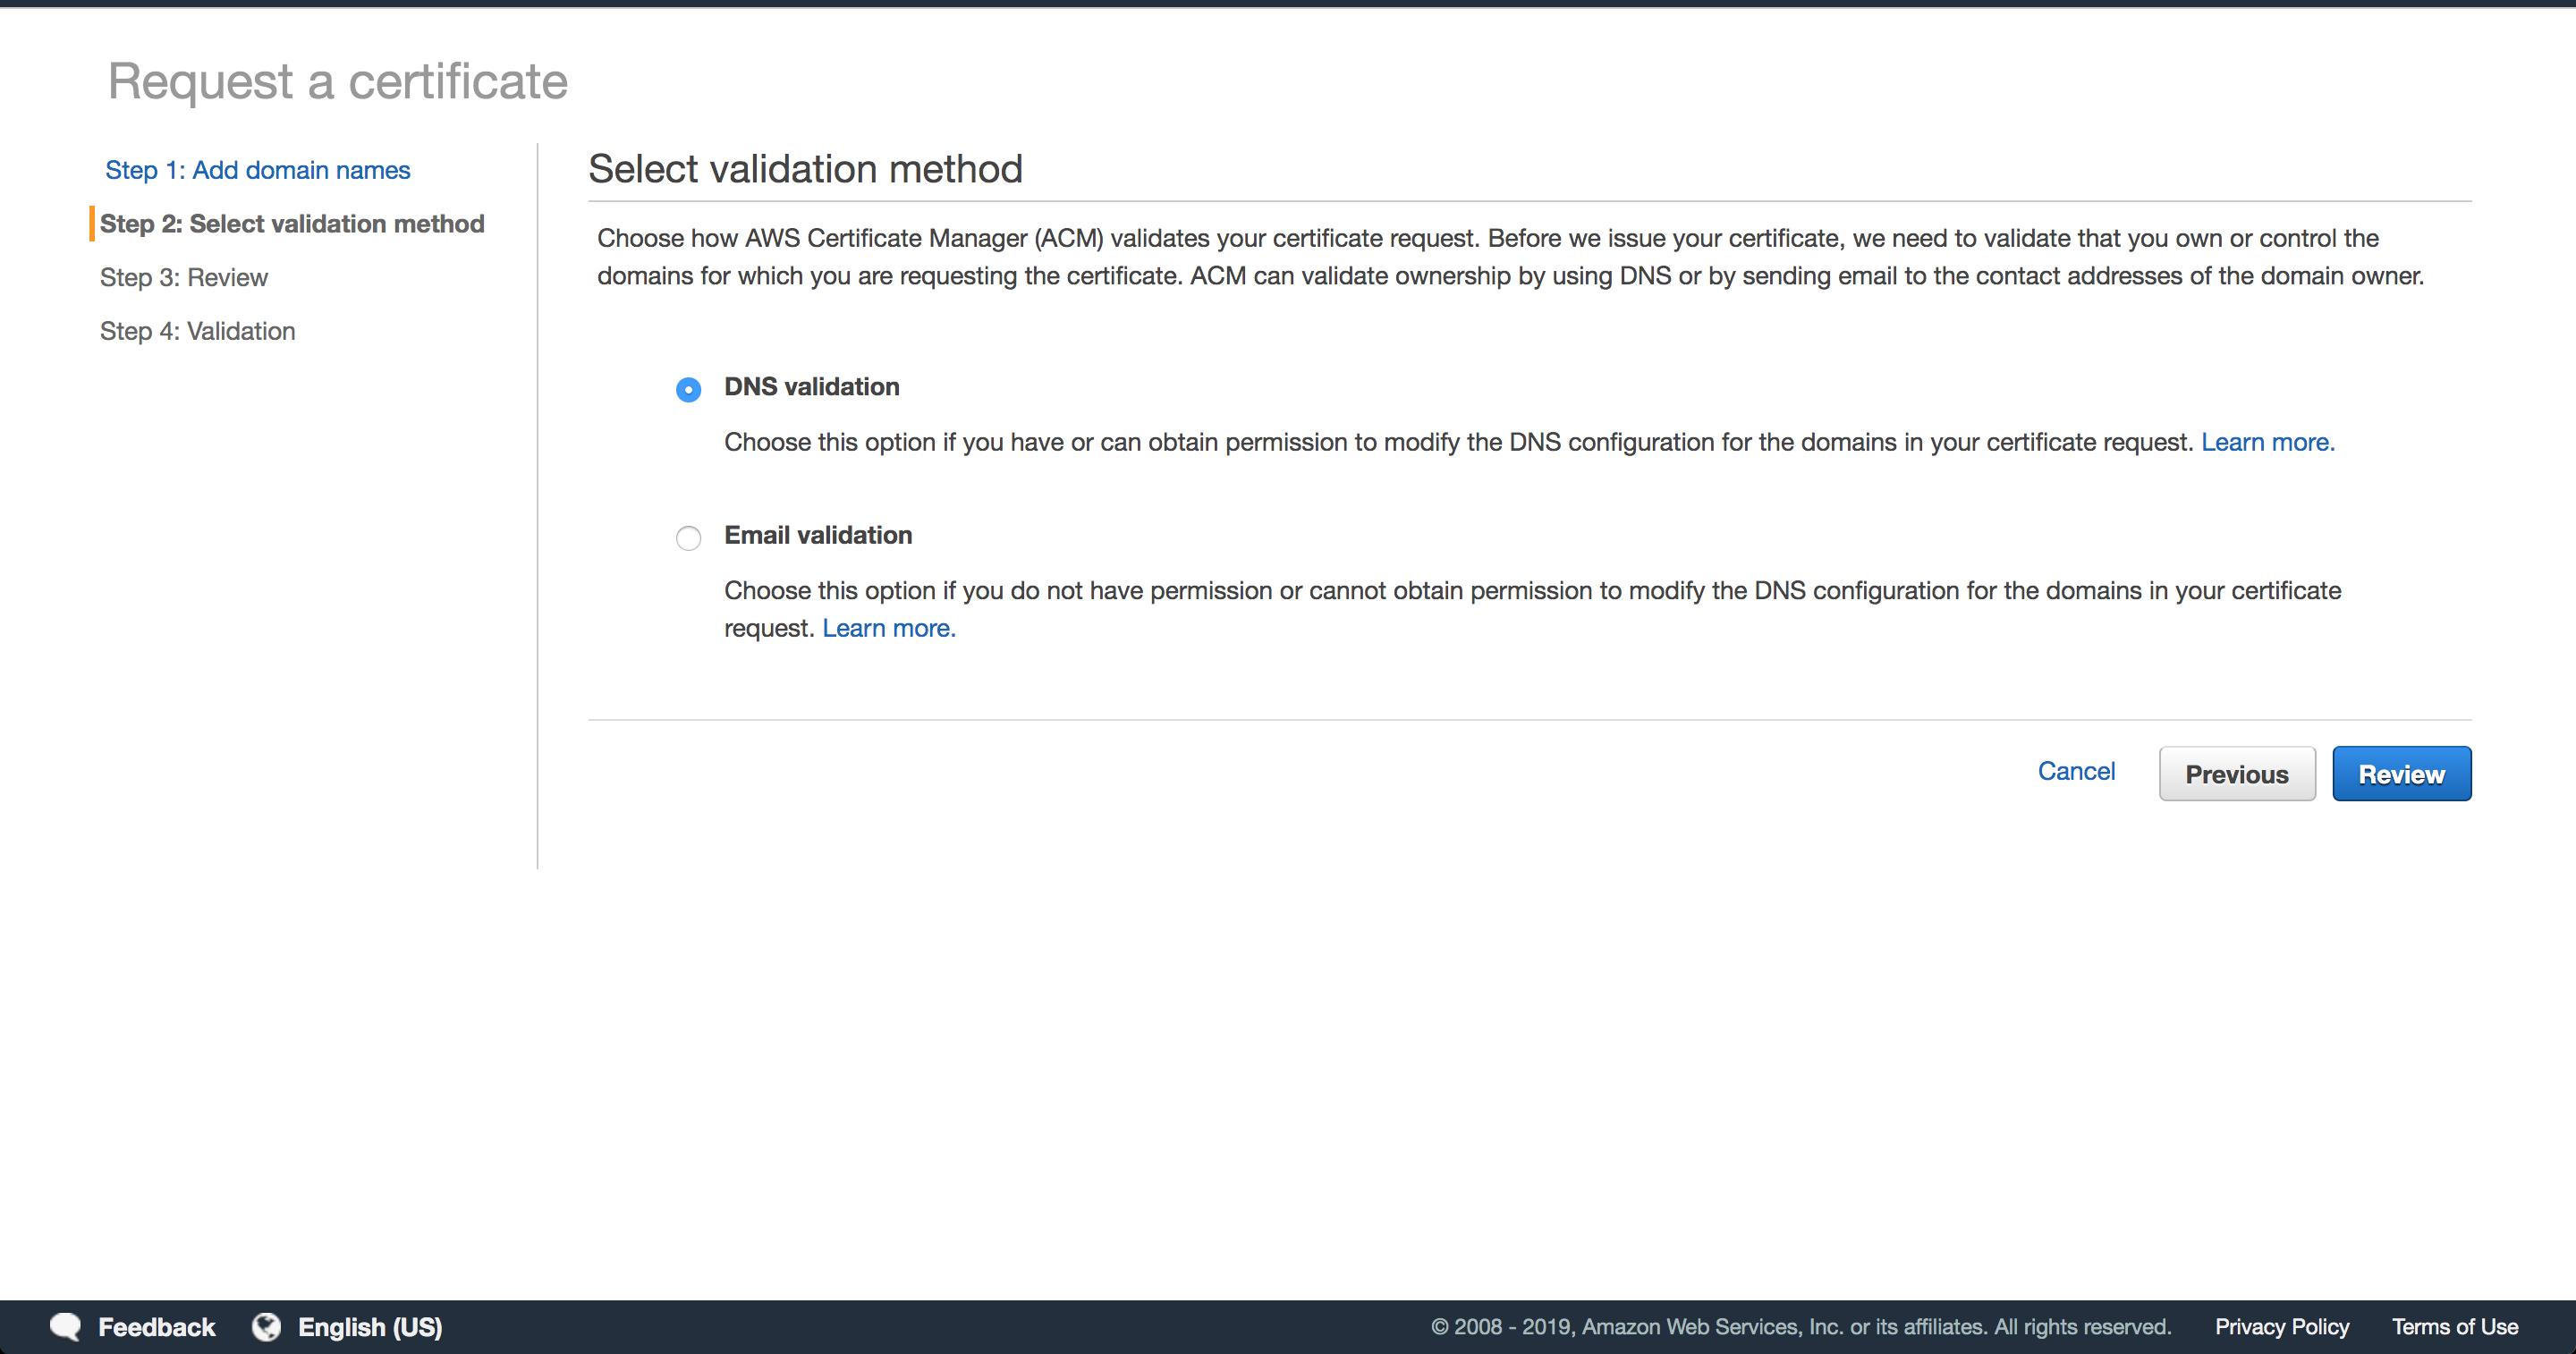
Choose your validation method. DNS validation is the preferred method. If you're controlling DNS through route 53 it gives an extra layer of convenience. When ready, Press Review then Confirm and request.
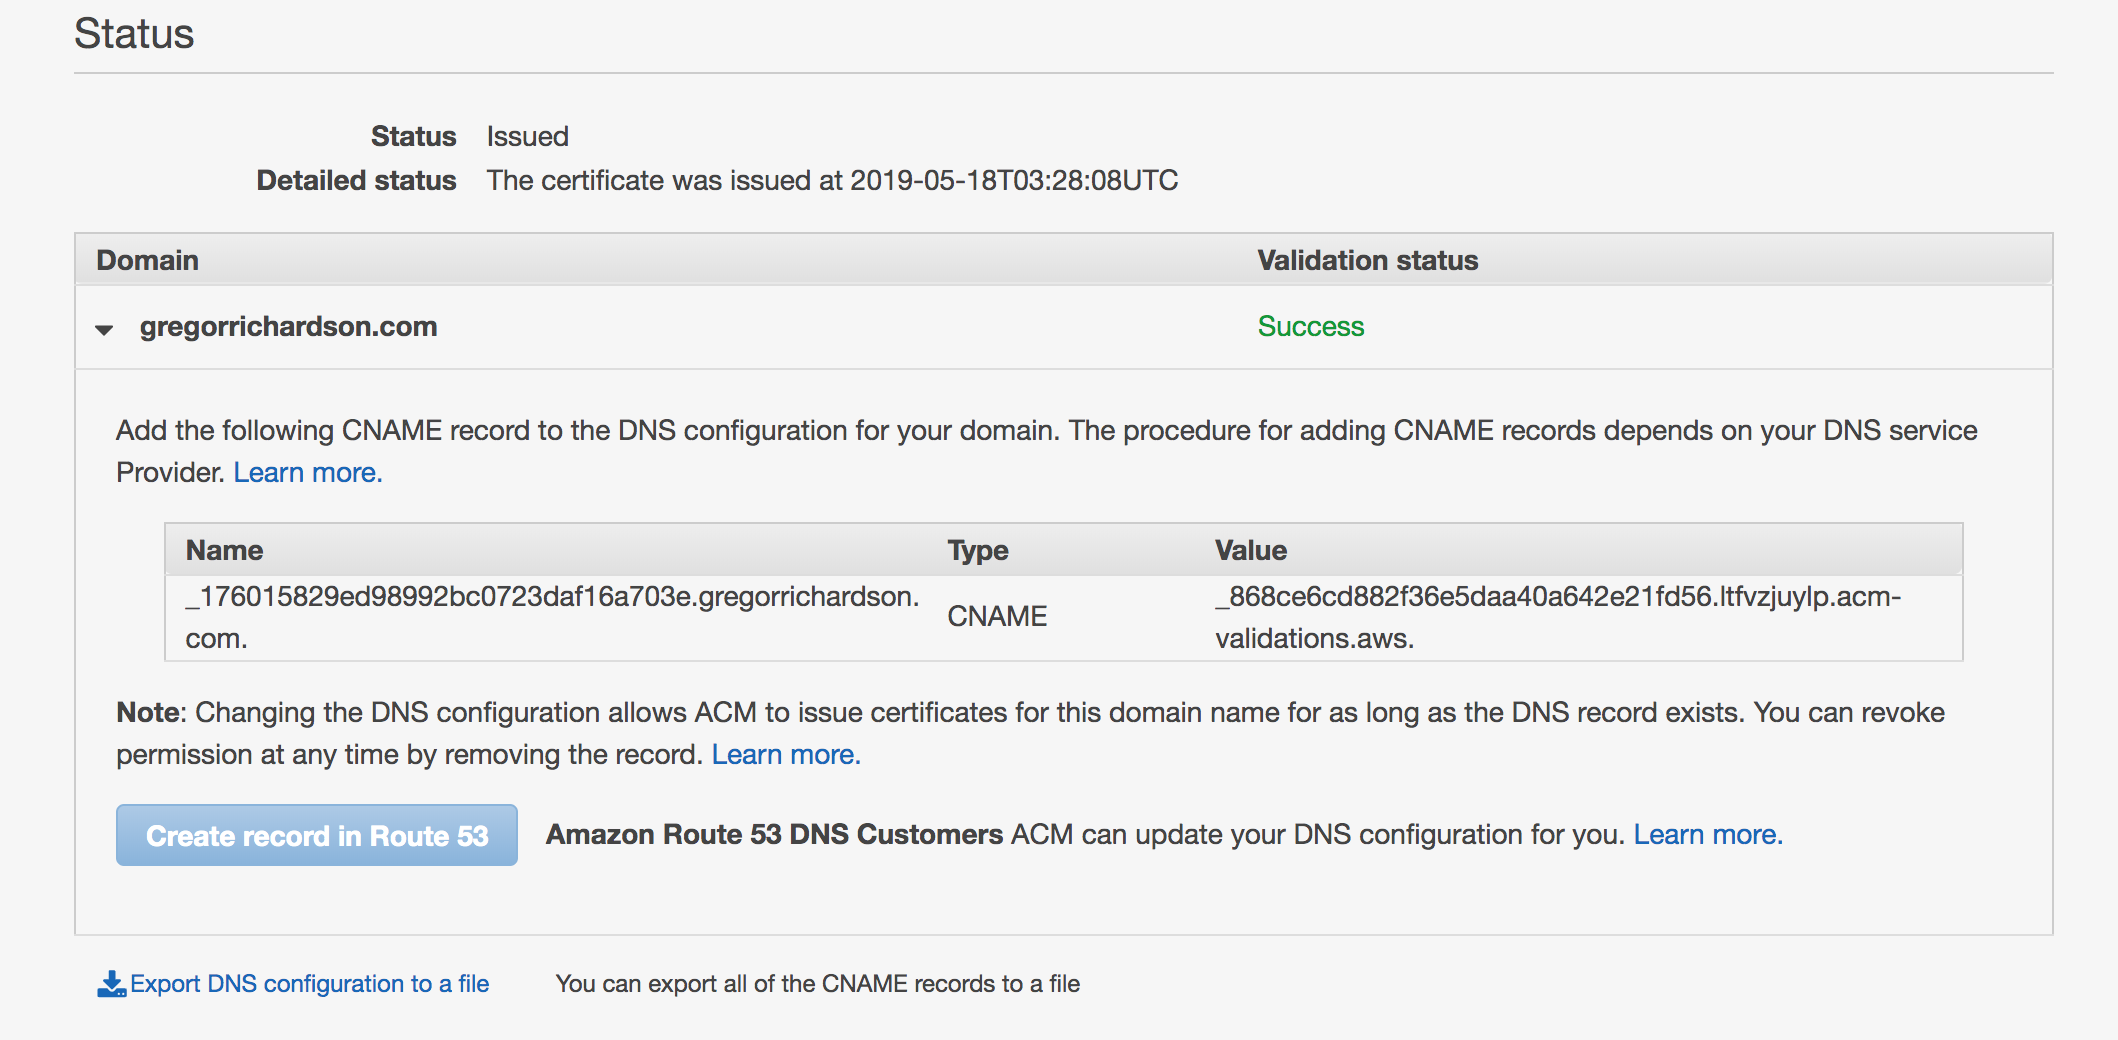
You'll be given a CNAME record which need to be inserted for verification. If you're using Route53, there's a convenient button to Create record in Route 53. Otherwise, open your DNS manager and add the Name and Value info manually.
Once the record is in place, it's time to wait. The cert may take as short as a few minutes to propagate or it may be multiple hours. In many cases you'll see the validation successful by refreshing the page only a few minutes after adding it. But if not, feel free to wait a while and return to this process later.
CloudFront Setup
-
Step 1: Create New Distribution
Open the CloudFront ConsoleCreate a new distribution. Make sure the Delivery Method is set to Web before continuing. Set Origin Domain Name to the static website hosting URL for your S3 bucket. Do NOT select the S3 URL from the autogenerated dropdown list. The public S3 endpoint is needed if you want sub directories to resolve properly.
mysite.com.s3-website-us-east-1.amazonaws.com
Origin Path can be index.html. Scroll to Distribution Settings and set Alternate Domain Names to your Domain name. Choose Custom SSL Certificate. If your certificate generation was successfully verified in the previous section you'll see your domain once you click into the text filed below.
Choose Custom SSL Certificate and select your domain from the dropdown menu
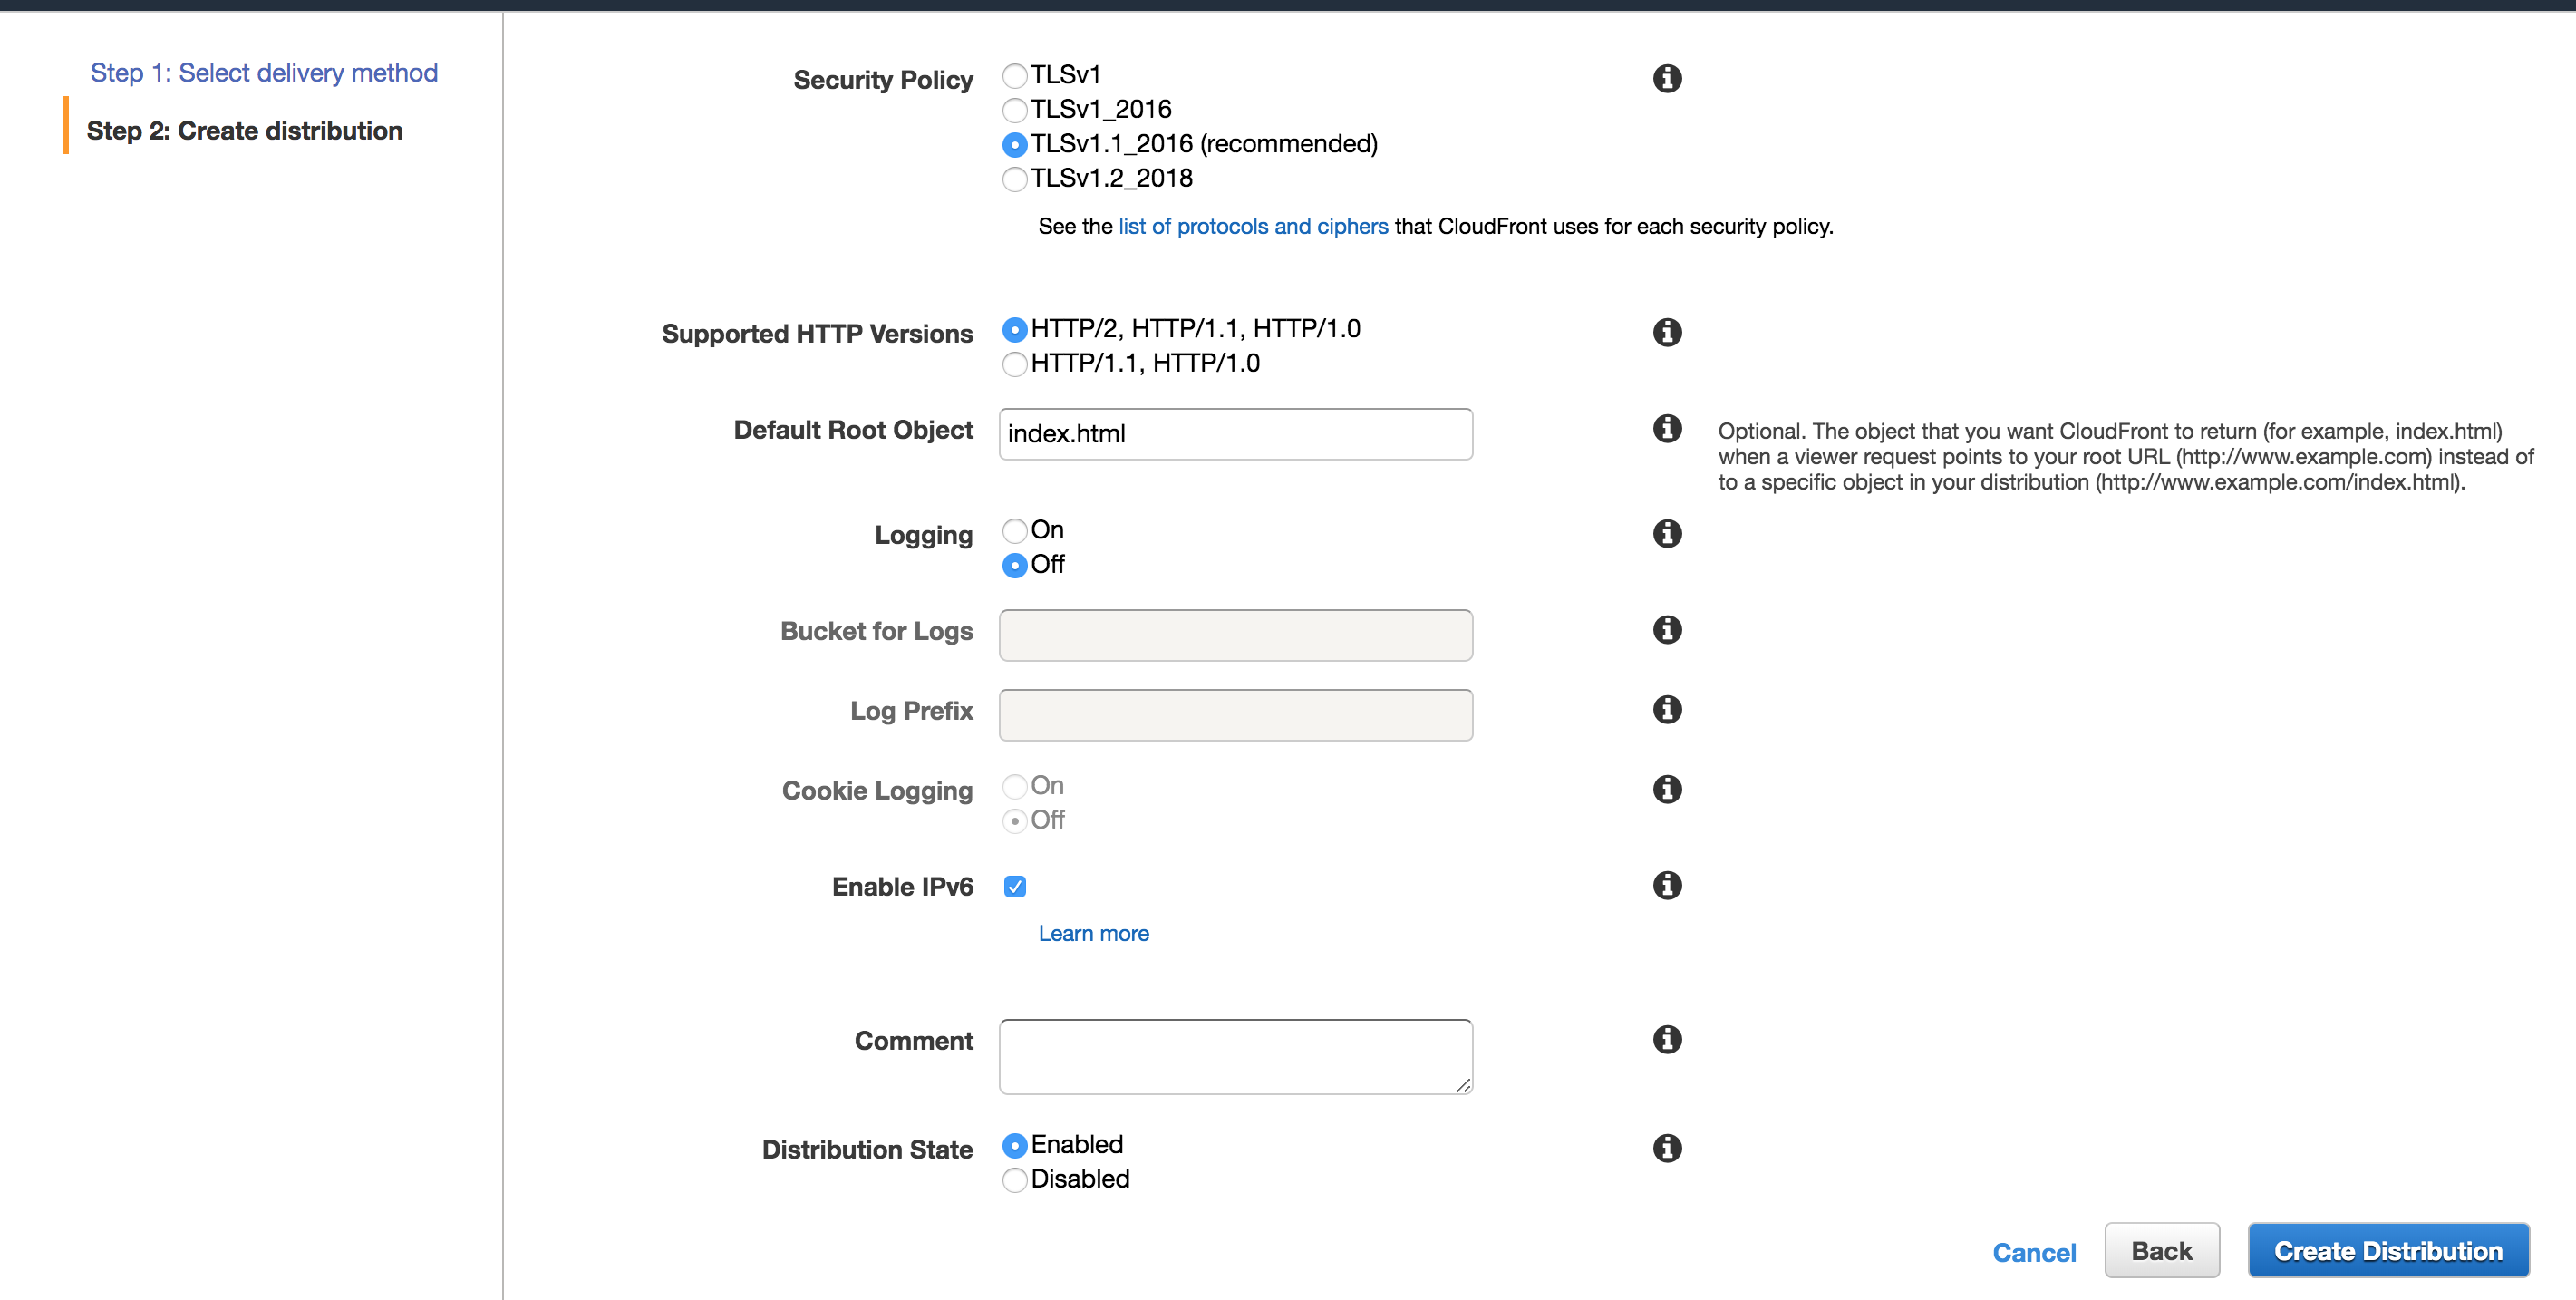
Set Default Root Object to match the selected file on your S3 bucket. Usually index.html. When ready, press Create Distribution
-
Step 2: Copy Distro URL
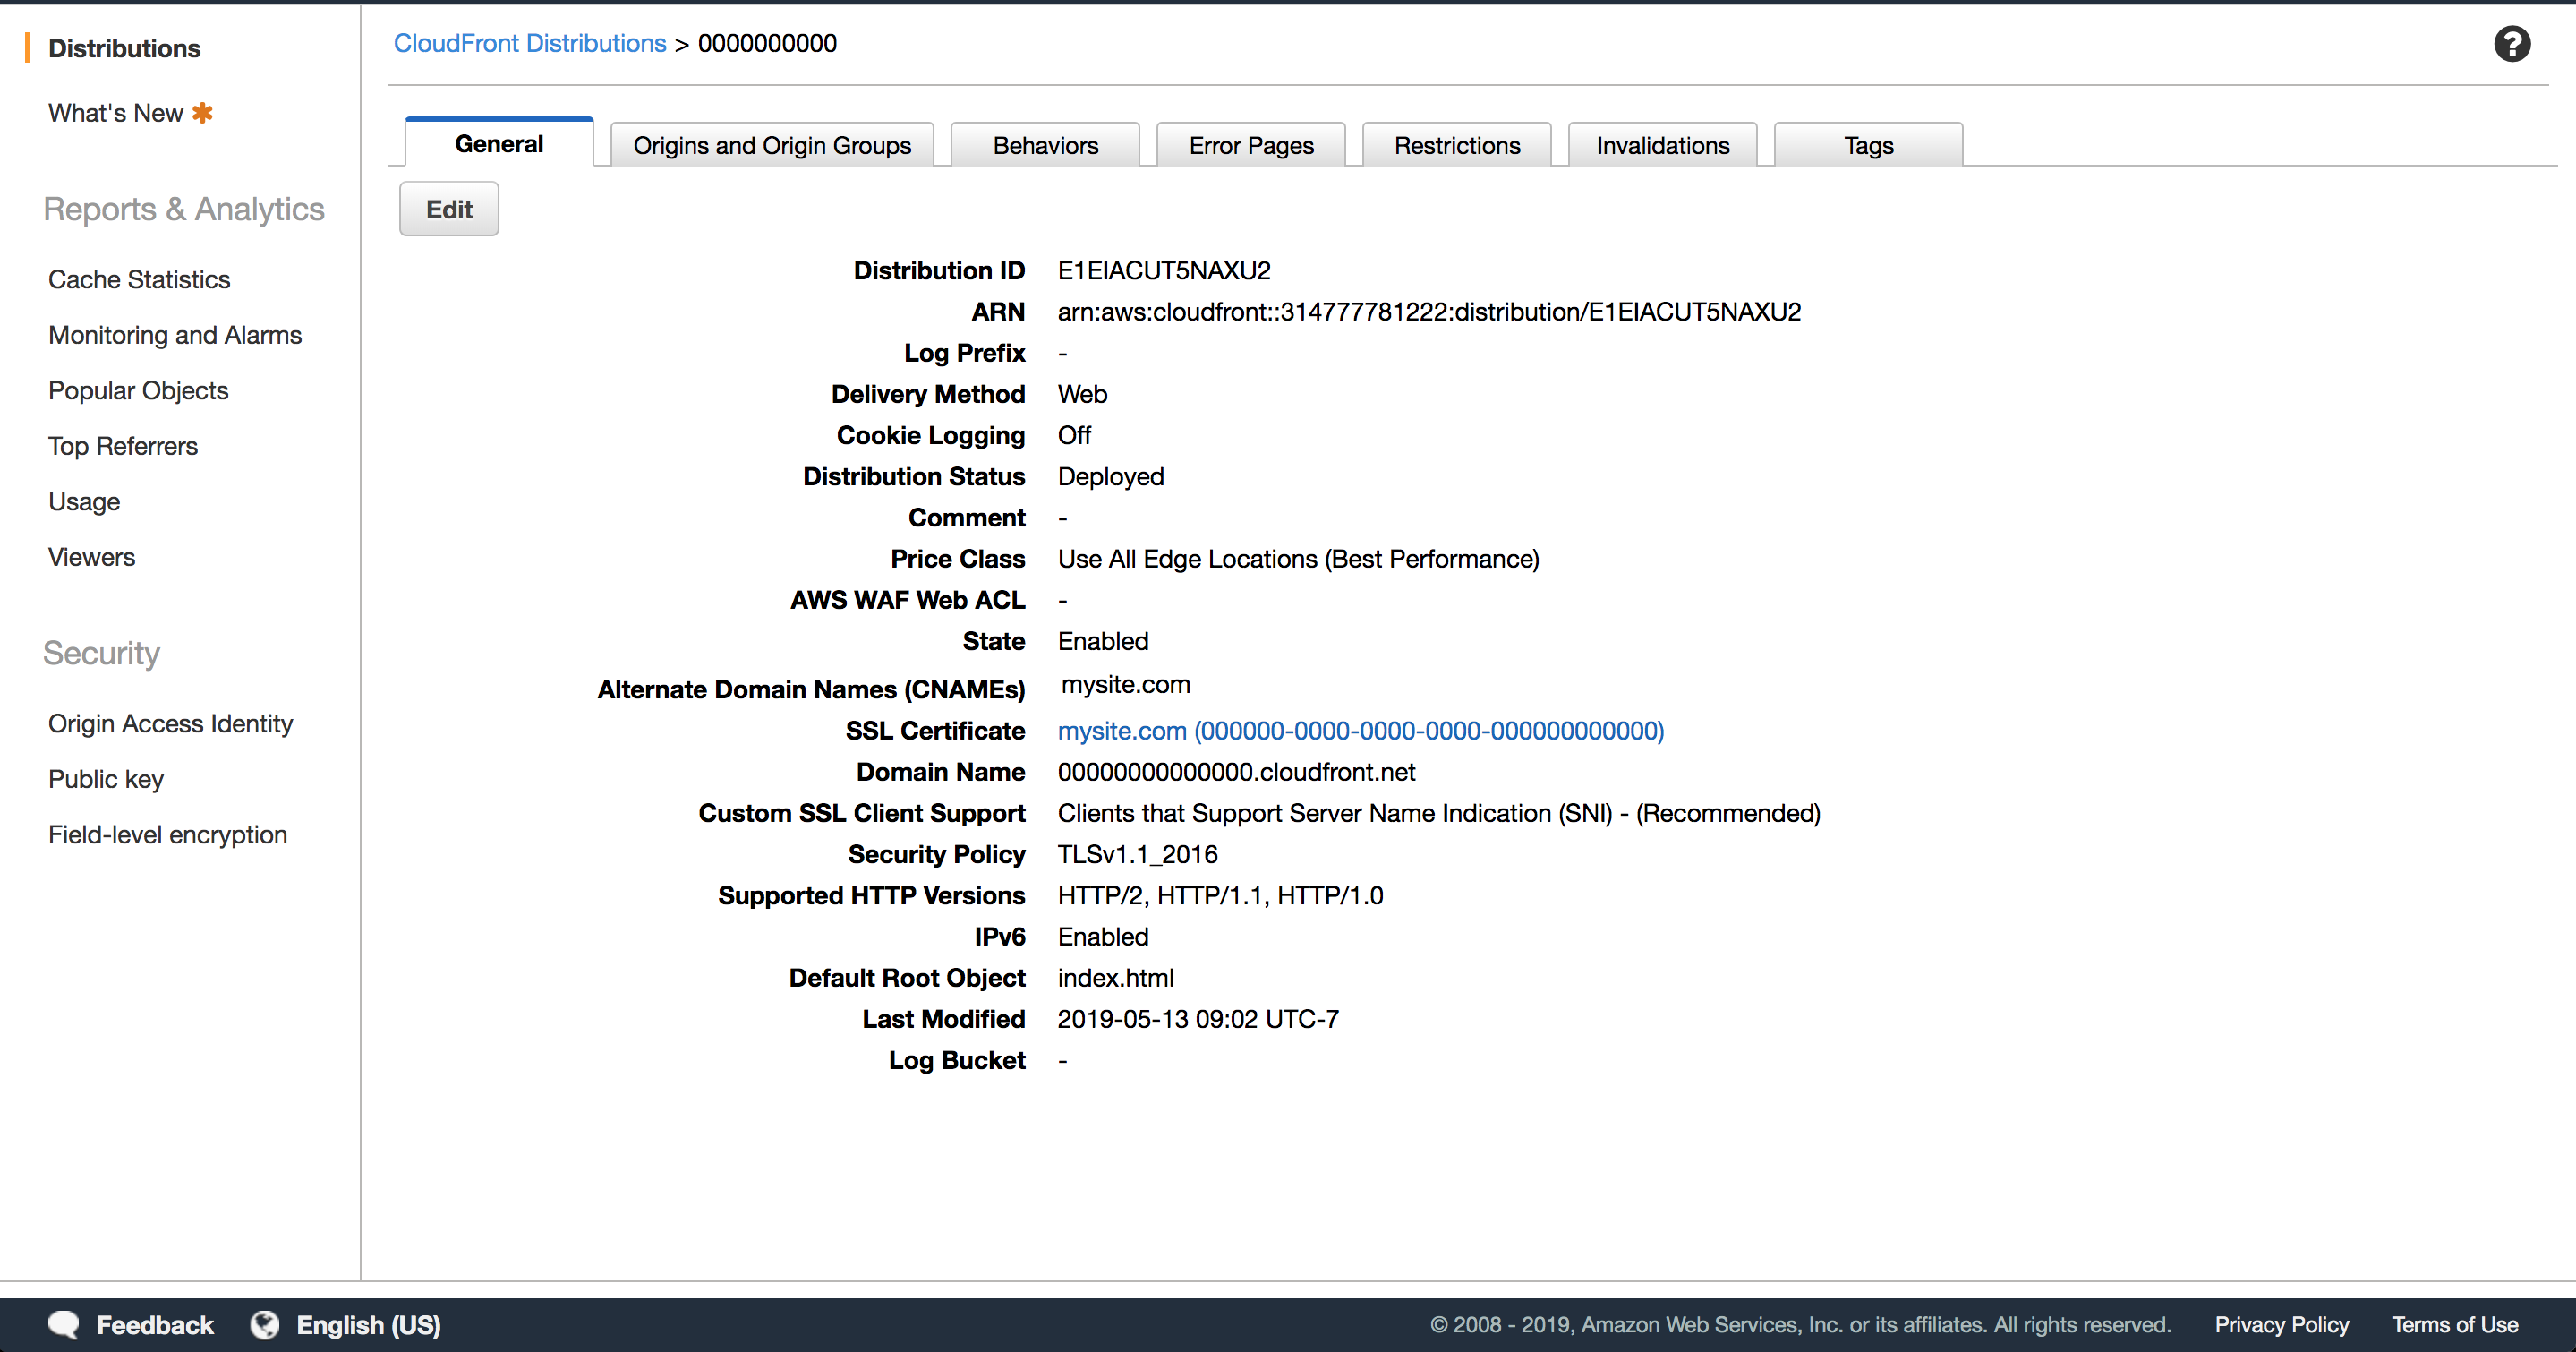
CloudFront will take a few minutes to spin up your new distribution. Once it's finished, click on the Distribution ID to open the Distribution Settings page.
On General tab, find Domain Name ending in cloudfront.net. Copy it to your clipboard for use in the next section.
Route 53 Updates
We're almost done. Our CloudFront distribution contains a valid SSL certificate and we need only to map the URL to the one of our choosing. We'll do that by removing our old S3 HTTP endpoint alias and replacing it with the HTTPS endpoint generated by CloudFront.
-
Step 1: Update A Record
Open the Route 53 Console. Enter into the correct Hosted Zone
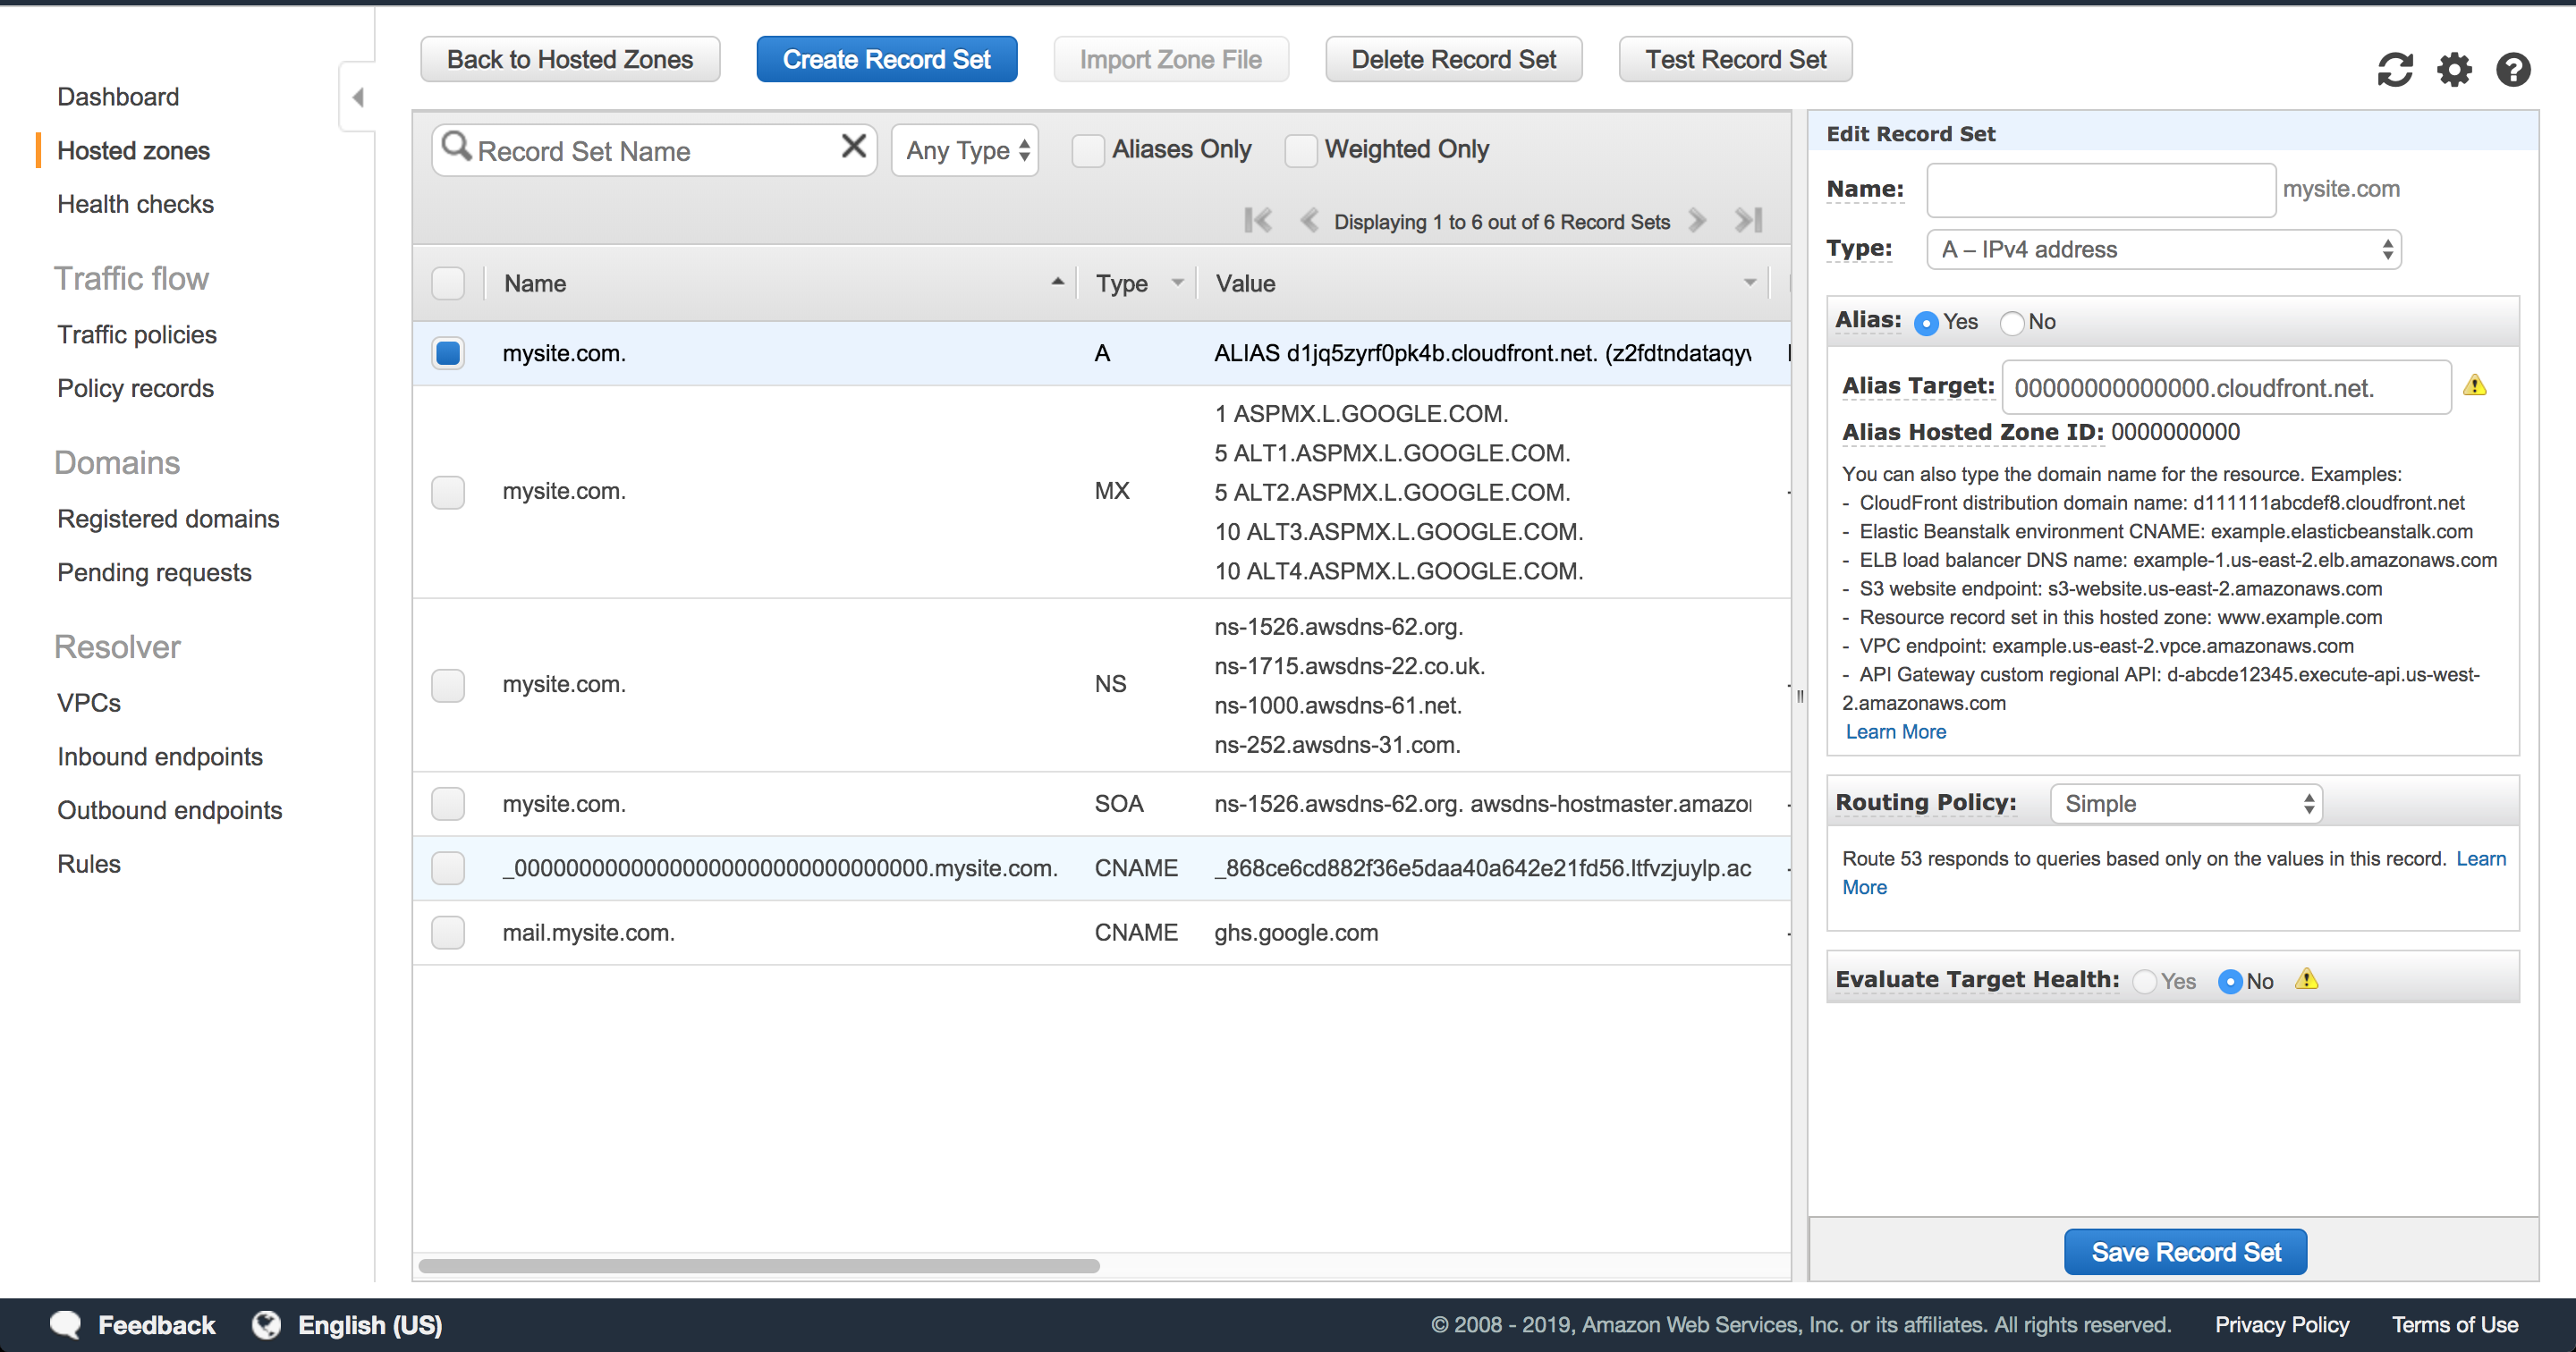
Edit the same A Record previously used for S3. Ensure it's still set as Alias and set Alias Target to the CloudFront URL copied previously
When ready, Save Record SetAnd you're done. You'll now be able to access your site through the HTTPS version of your specified domain.
Further reading:
https://docs.aws.amazon.com/AmazonS3/latest/dev/WebsiteHosting.html
